Also check out the Apple //e Twitter Display for another take on this idea.
 I’ve partitioned my social networking life into two fairly distinct pieces. Facebook is for friends and family, and Twitter is for my technology hobbies. Facebook is for vacation photos, and Twitter is for the latest news on robotics, CNC, Maker culture, etc. One consequence of this is that I usually only check Facebook once or twice a week to catch up on what people are doing and reject requests to join The Mafia/Vampire Clans/Farmville. However, I find myself checking Twitter multiple times a day, because there’s a constant stream of interesting technology tidbits coming in. Twitter is the cocktail party full of interesting sound-bites to Facebook’s Thanksgiving Dinner at Uncle Ralph’s house.
By its very design, Twitter doles out info in bite-sized nuggets of 140 characters. So the information is concise and easily digested, and likewise my Twitter sessions are short but frequent. Taken to the limit, it becomes essentially a broadcast of information trickling in constantly so why should I poll for it in my browser? Now there’s a million-dollar idea – I think I’ll call it Push Technology.
The Internet of Things is coming, and I’m convinced in the next 10 years the internet will be less about general-purpose computers like we use today and more about dozens of purpose-specific connected devices. In a future where applications will become physical objects, why not turn a web site into a piece of furniture like a Twitter Wall?
Raw Materials
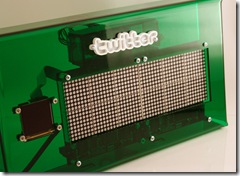
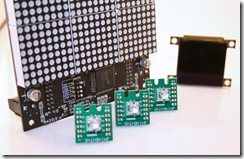 The ideal presentation of a tweet is the text of the tweet itself along with the sender’s name and avatar picture. So I grabbed some LED Matrices for some nice big text and a small OLED screen for the avatar picture. That covered the functional pieces, but for aesthetics (it is going to be hanging on the wall) I wanted some color LED backlighting so I threw some ShiftBrites into the design as well.
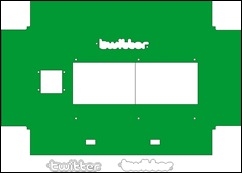
I decided to build an acrylic enclosure. I had some scraps of various colors laying around but only one large sheet, so the color was going to be transparent green. I laid out the design in vector art and cut the acrylic on an Epilog Laser Cutter at TechShop.
Cutting & Bending
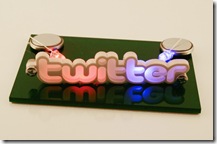
For the LED backlighting I wanted to do a Twitter logo with a diffuser to soften up the lighting. I had seen some folks use diffuser panels effectively with LEDs at Maker Faire last year but wasn’t sure what kind to use, so I picked up a sample acrylic diffuser panel at Tap Plastics and cut it out.
The results were quite good. The left picture below shows the diffuser panel cut out with a LED shining through it. The Twitter logo outline is cut from opaque white acrylic which was layered on top to give a clear white outline around the lit piece. The picture on the right shows the two layers of acrylic assembled and back-lit with a pair of LEDs.
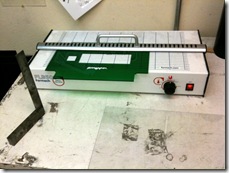
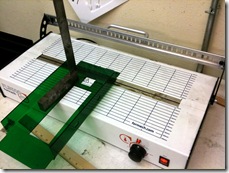
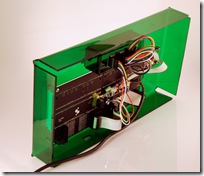
I designed the acrylic with tabs that would be bent backwards to create a box enclosure. TechShop recently got a thermoplastic bender and I tried it out for the first time on this project. It couldn’t be simpler – turn it on, lay your acrylic over the heating element for 5 minutes and then bend into place.
The Finished Product
I connected the LED Matrices, OLED screen and ShiftBrites up to a small Arduino-compatible board from adafruit and wrote software that controls them over a serial protocol from my PC. The PC calls the Twitter API to fetch a list of tweets and then sends the text and picture to the Arduino for display.
The serial connection to the Arduino is plenty fast to send the text quickly, but the images are 128×128 16-bit-per-pixel which means 32K of data and takes quite a while to transfer. Fortunately the OLED display has a micro-SD card slot and can store images locally. So my software keeps a directory of image URIs and their locations on the SD card. The first time an image is encountered it must be transferred to the card but subsequent times drawing the image simply means sending the Arduino the 3-byte card address to draw from.
The LED matrices were purchased cheaply on eBay from Sure Electronics. I wrote an Arduino library that abstracts them and provides a nice set of high-level text rendering APIs and 2 fonts. If you are planning to drive some LED matrices, I highly recommend these and you can download my library here.
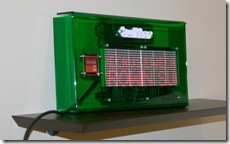
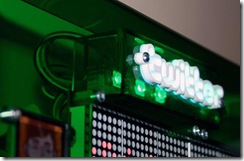
It can sit on my desk or sit on a shelf and deliver me a constant stream of Twitter wisdom.
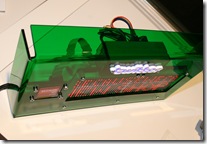
The bright LEDs and highly reflective acrylic make it hard to get a good picture of these when they’re turned on. The video below shows what it looks like in a completely darkened room and then with the lights on.
Software
A few folks have asked about where to get the LED matrix and how to connect them and drive them, so I posted some info and links here: http://www.atomsandelectrons.com/blog/post/Pushing-Pixels.aspx
