When I finally get around to writing my self-help book, it will be entitled Everything I Needed To Know About Life, I Learned From The Apple ][. It was my first computer and to really get the most out of it you needed to understand how it worked at the lowest levels. It was the period of my life when I had no money and nearly infinite time, so spending weeks reverse-engineering games and copy protection schemes to understand how they worked was the norm. I learned persistence, dealing with constraints and a work ethic from those experiences. Like any formative experience, it left an indelible impression on me. If I’m ever called-upon to testify in a court of law, I’d like to be sworn in with one hand on The Red Book.
One of the valuable lessons I learned was that hardware designers behave according to a rigorous set of strictures passed down from the Marquis de Sade as a way of torturing software developers. I know just enough about hardware to recognize the brilliance of Steve Wozniak’s Apple ][ design. But the savings of a few logic gates led to one of the most bizarre frame buffers I’ve ever encountered – the Apple ][ hi-res bitmap display.
First off, it’s a 1-bit per pixel display that can display 6 colors (or even 7 colors because there’s a half-pixel shifted version of white – I’m not making this up!). I’m not going to explain how that works, but only mention it because when I was 12 I thought it was completely normal and that’s just how computer graphics worked. It was the raster graphics version of being raised by wolves. Each byte contains 7 pixels of data in the lower 7 bits, but they are in reverse order. So the leftmost pixel is the least-significant bit. Thus, as you march across the screen you end up going right in bytes, but left in bits which then translates into right in pixels. I think this is where Michael Jackson got the inspiration for the Moonwalk. And that 8th bit is special and relates to the colors, so converting a bitmap to Apple ][ native format requires insane feats of bit-shifting, bit reversing and dividing by 7. It’s bizarre and completely nonsensical, and 30 years later I can still do it in my head without even thinking. Woz, if you’re reading this, I want those neurons back.
The cherry on top is that once you’ve zig-zagged your way across an entire scanline your reward is that you need to do some tests and math to calculate the address of the next scanline because (ahem) the scanlines are interleaved.
Now Let’s Complicate Things
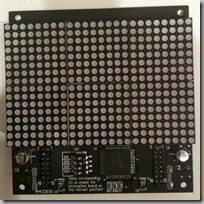
I encountered something that is actually a little bit more bizarre recently. There’s a company called Sure Electronics that sells very inexpensive LED matrix panels. They sell a nice 24×16 panel for $10 that includes a driver you can control with a simple serial protocol. That’s a hell of a deal and was just what I needed for some wall displays I was building. Interestingly they use a Moonwalk-style memory layout as well, but theirs jumps every 4 bits instead of 7 and it’s rotated 90 degrees. Yes, the pixels are laid out in column-order rather than row order.
But at a price of under $0.03 per LED I’ll happily fix it in software. They have 2 panel sizes: a 32×8 panel that is good for displaying a single line of text and then a 24×16 panel that isn’t really good for anything but is cool.
 32×8 LED Panel available in red, green or yellow

24×16 LED Panel
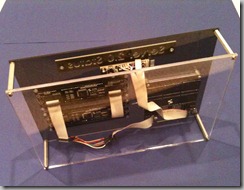
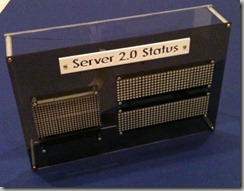
I stuck 2 of the 32×8 panels and one of the 24×16 panels in a custom laser-cut acrylic enclosure to use as a status display for work. It’s driven by a Modern Device RBBB Arduino microcontroller board and connects up to a PC through a FTDI USB-to-Serial cable. This allows the board to be bus-powered and have a convenient serial-connection to the PC which allows live update of data to the display.


The Right Abstractions
Having a live connection to the PC also meant I could deal with the insanity of the frame buffer on the PC and just feed ready-made bitmaps to the display panel over the serial link. This keeps the complexity on the PC where we have rich debugging tools and the microcontroller code is dirt simple. It just reads bitmaps from the serial link and blasts them directly to the LED panel.
Here’s a video of a test pattern animation running on the display:
The display title at the top was cut from white acrylic on a laser cutter. Here’s a brief video of the laser cutter doing it’s thing. If you look closely you can see small flames jumping up off the acrylic as it’s being cut.
This project was a test of the LED panels and how fast I could drive them in preparation for a more ambitious project to build a wall display to show Facebook updates. For that one I’ll want to add a separate color display to show profile pictures.